Quick Start Guide
- Download the installer from the DataSync portal landing page
- Install the application by running the installer as administrator
- Configure your database connection and settings using the Configuration Tool
- Authenticate with your Azure AD credentials
- Start the Windows service to begin synchronization
Table of Contents
1. Setup Guide
Follow these steps to install and configure the DataSync Client on your computer. The entire setup process typically takes about 10-15 minutes.
Download the Installer
- Visit the DataSync landing page provided by your administrator
- Click "Download Latest Version" to download the installer package
- Save the file to your computer (e.g., Downloads folder)
Run the Installer
Right-click the downloaded installer file and select "Run as administrator".
The Setup Wizard will guide you through the installation:
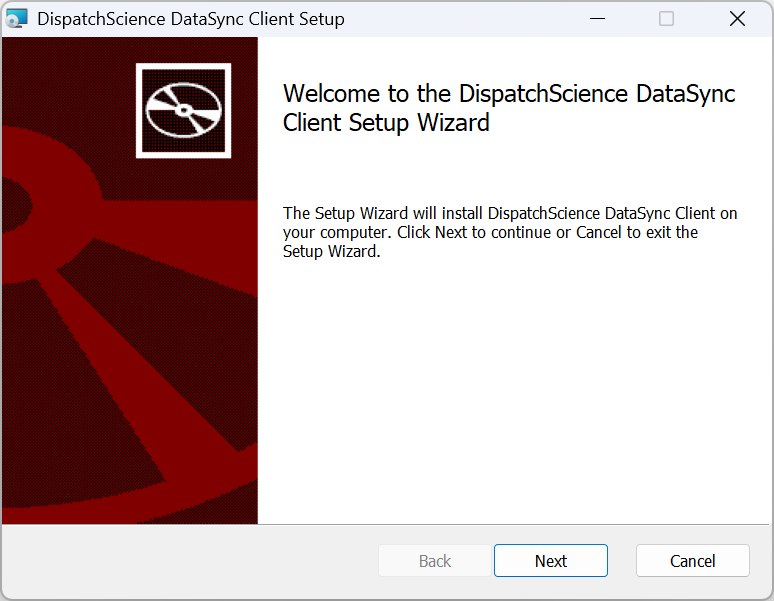
Figure 1: The Setup Wizard welcome screen
Click Next to proceed. You will be presented with the license agreement:
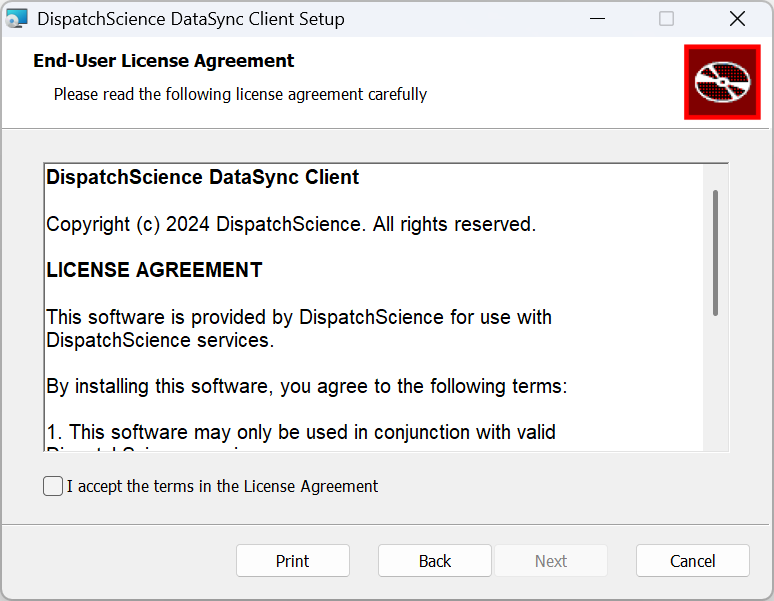
Figure 2: Accept the license agreement to continue
- Read the license agreement carefully
- Check "I accept the terms in the License Agreement"
- Click Next to continue
- Choose the installation location (default:
C:\Program Files\DispatchScience\DataSyncClient) - Click Install to complete the installation
The installer will automatically:
- Install the DataSync Client Windows service
- Install the DataSync Configuration Tool
- Create Start Menu shortcuts
Once installation is complete, you'll see the completion screen:
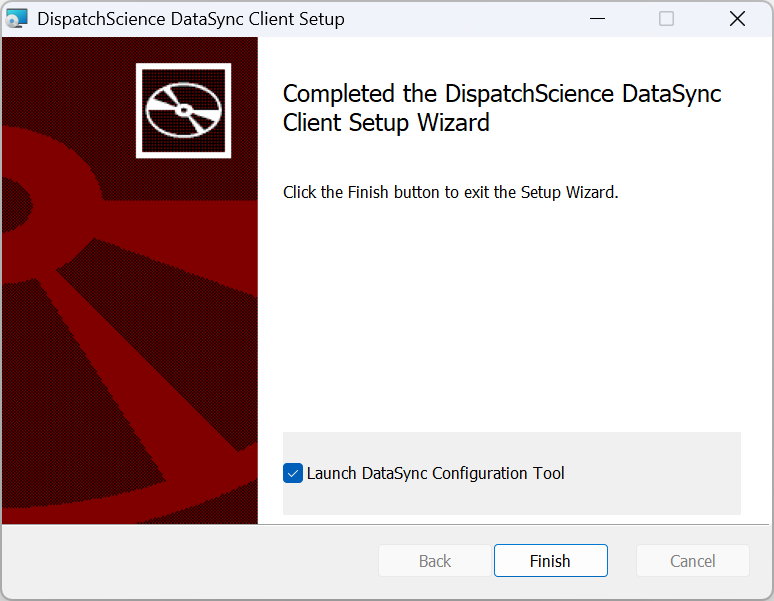
Figure 3: Installation complete - check the box to launch the Configuration Tool
Check "Launch DataSync Configuration Tool" and click Finish to open the configuration tool immediately.
Configure Client Settings
After installation, open the DataSync Configuration Tool from the Start Menu.
Navigate to the Settings tab to configure your client:
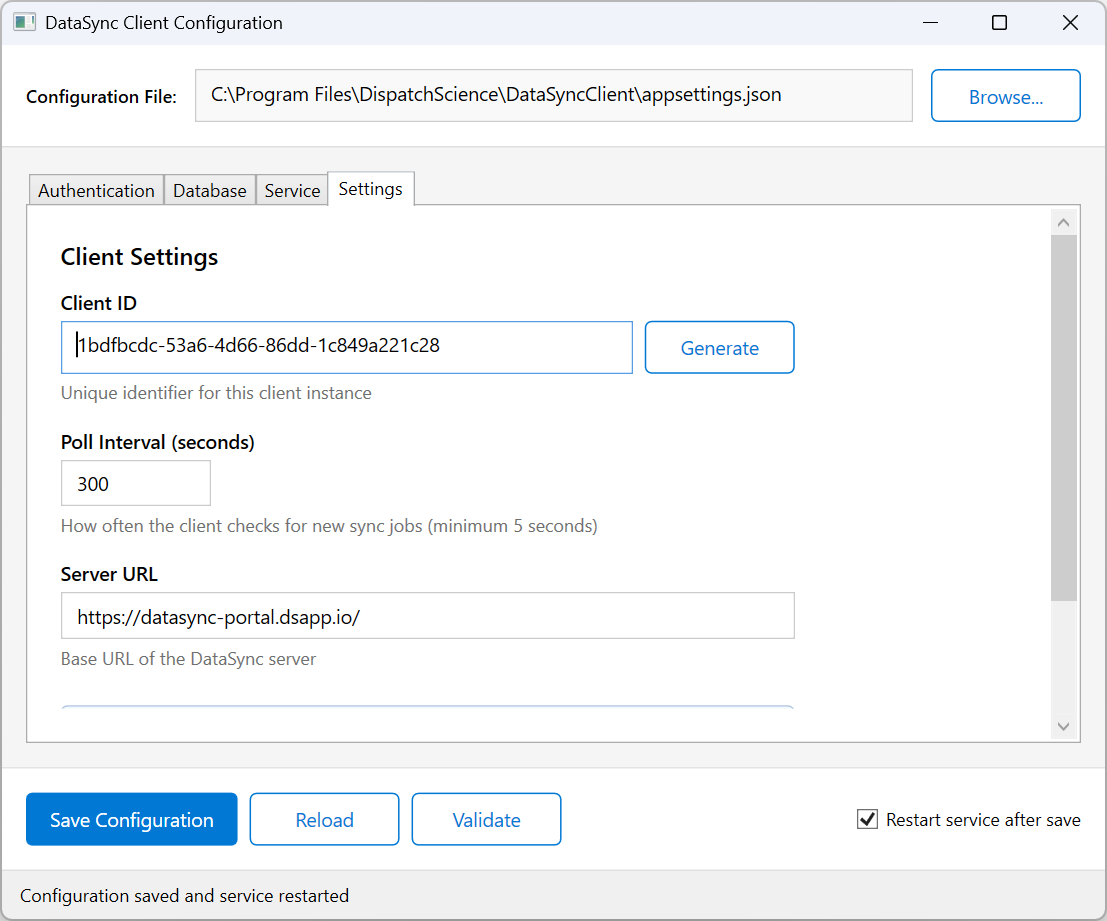
Figure 4: The Settings tab in the Configuration Tool
Configure the following settings:
| Setting | Description |
|---|---|
| Client ID | A unique identifier for this client, automatically generated from the computer's MAC address. This field is read-only and ensures the same machine always uses the same ID |
| Server URL | The DataSync server URL (e.g., https://datasync.dsapp.io/). This will be provided by your administrator |
Note: The polling interval (how often the client checks for new data) is managed by the server and can be adjusted by your administrator from the DataSync portal.
Configure Database Connection
Navigate to the Database tab to configure your local SQL Server connection:
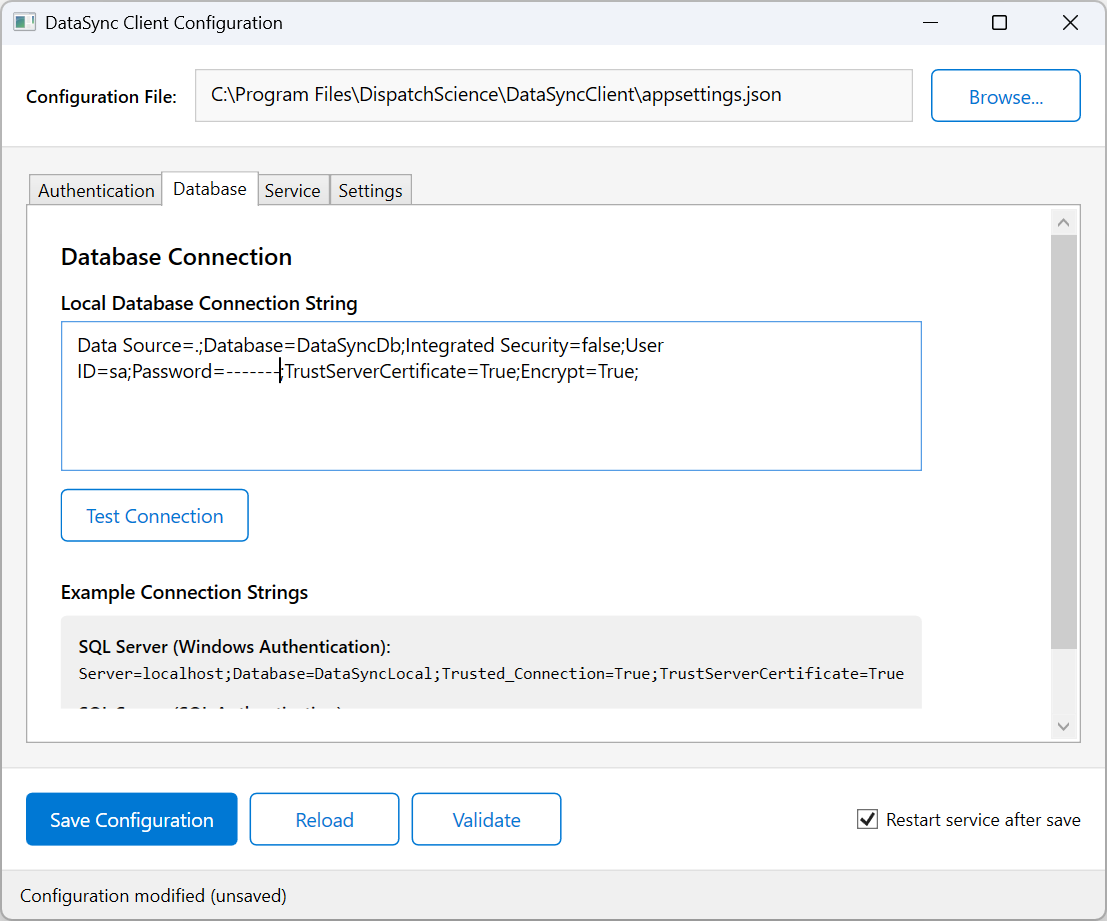
Figure 5: Configure your local database connection
Enter your SQL Server connection string in the Connection String box, then click
Save Connection String. The value is stored locally in this machine's
appsettings.json (ConnectionStrings:LocalDb). Example connection strings:
Windows Authentication:
Server=localhost;Database=DataSyncLocal;Trusted_Connection=True;TrustServerCertificate=TrueSQL Server Authentication:
Data Source=.;Database=DataSyncDb;Integrated Security=false;User ID=sa;Password=yourpassword;TrustServerCertificate=True;Encrypt=True;Sign In with Azure AD
Navigate to the Authentication tab and click "Sign In / Re-authorize".
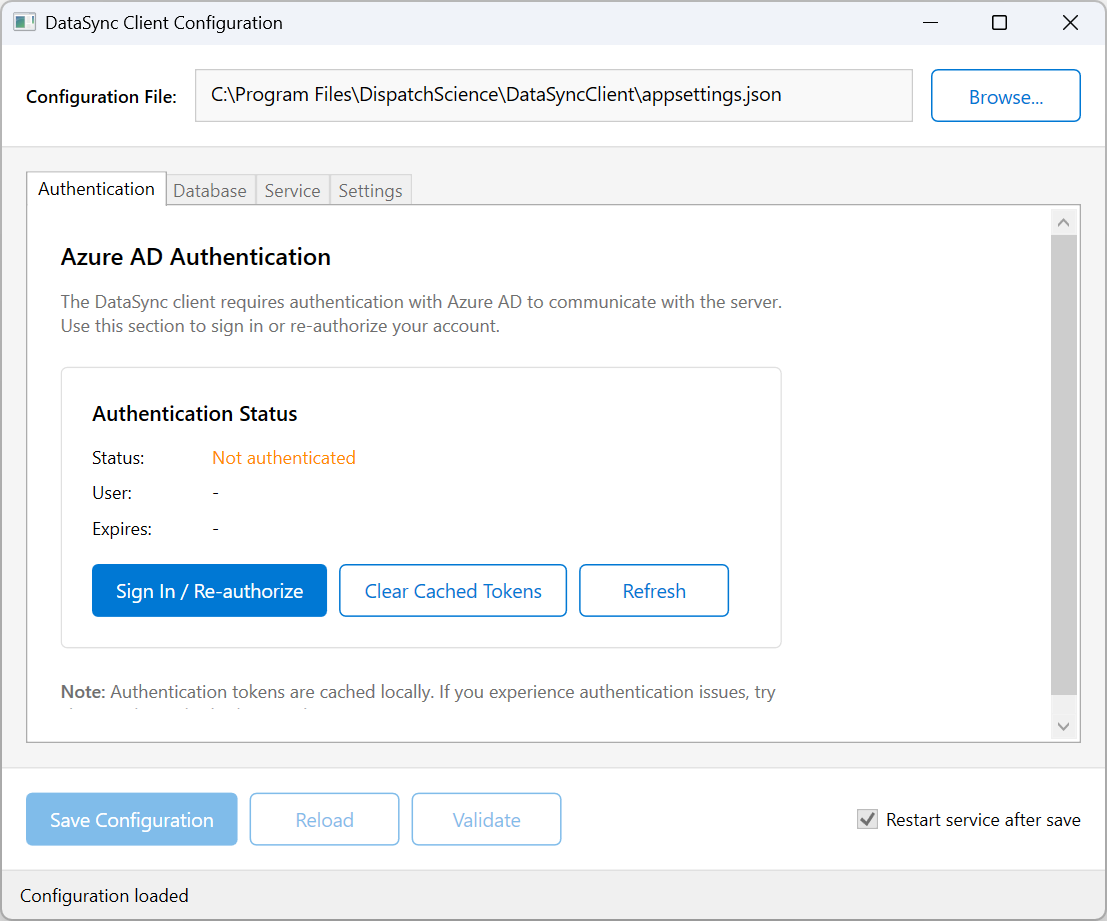
Figure 6: The Authentication tab before signing in
- A browser window will open to the Microsoft login page
- Enter your Azure AD credentials (email and password)
- Complete multi-factor authentication (MFA) if prompted
- Grant consent for the DataSync application if requested
- Return to the Configuration Tool - your authentication status will update
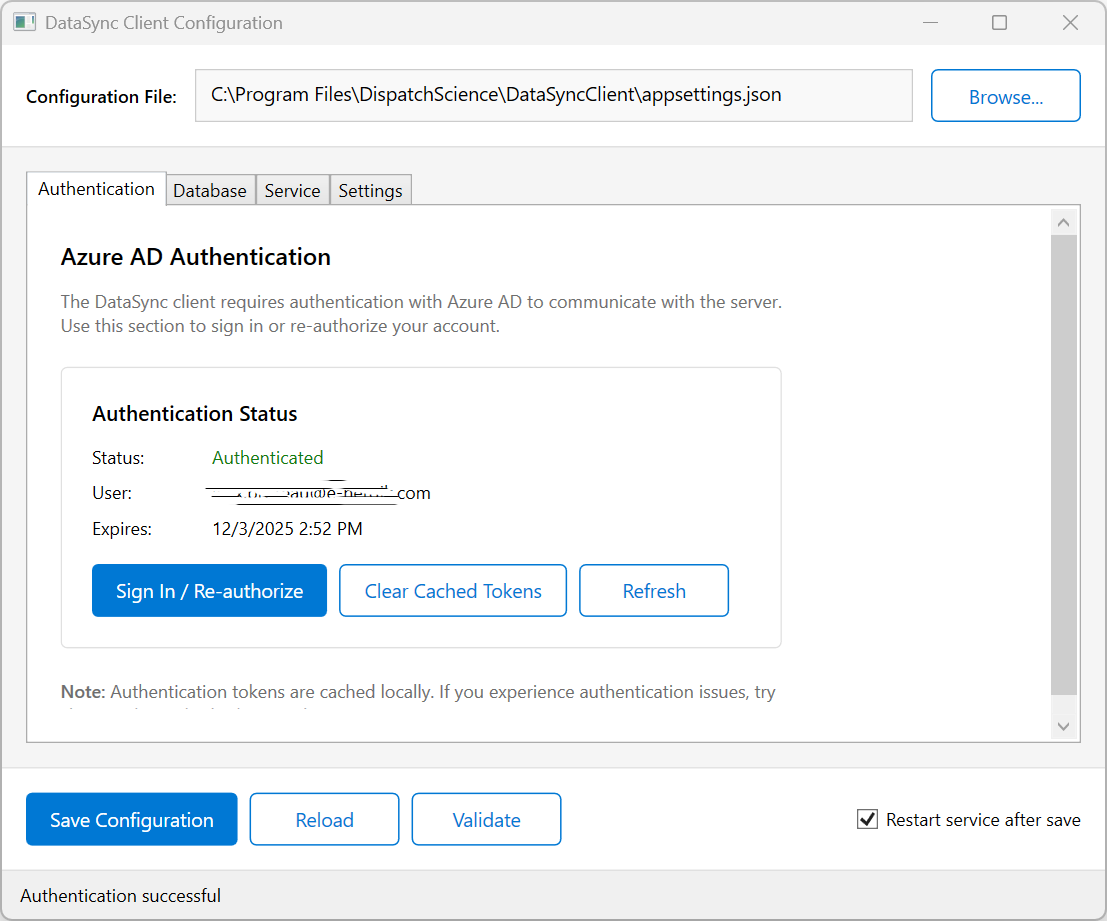
Figure 7: Successfully authenticated with Azure AD
Save Configuration and Start Service
Click "Save Configuration" at the bottom of the window to save all your settings.
Navigate to the Service tab to start the Windows service:
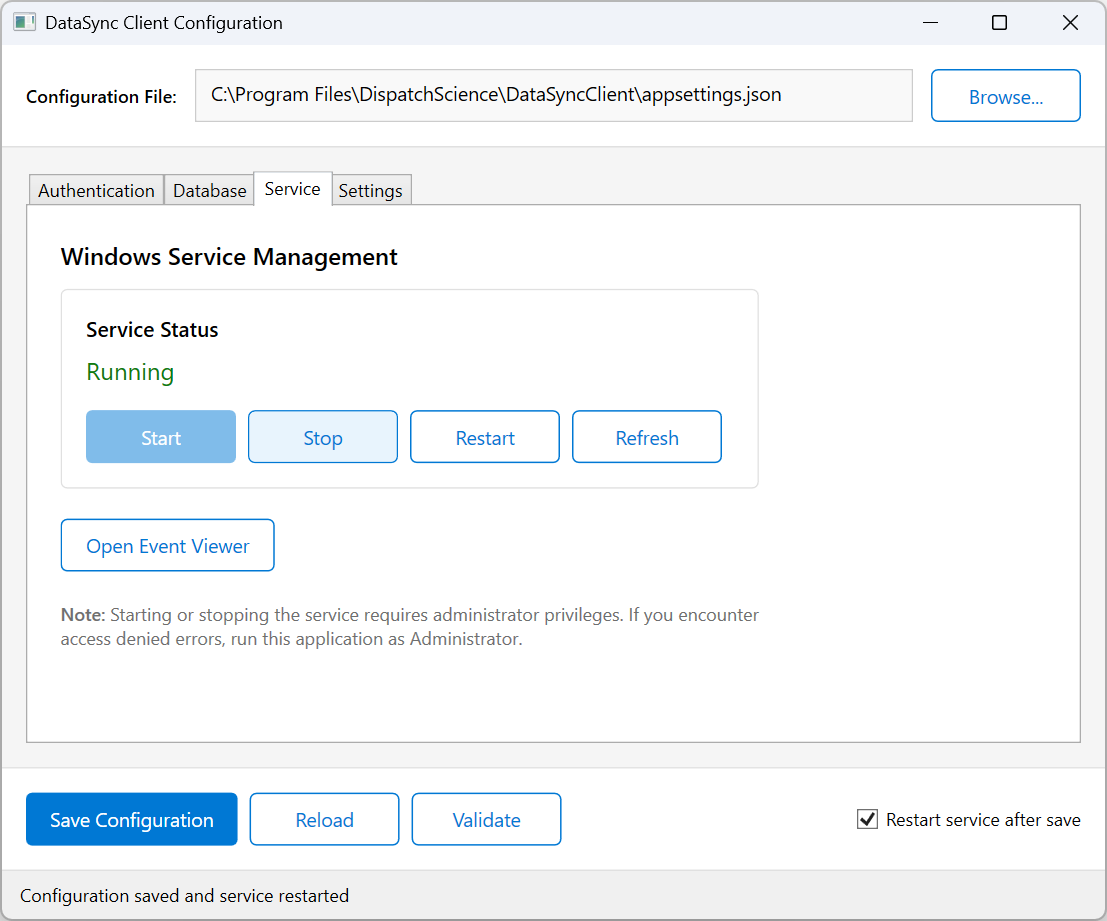
Figure 8: Manage the Windows service from the Service tab
- Click Start to start the DataSync service
- The Service Status will change to Running
- The service will now automatically synchronize data in the background
2. Updating an Existing Installation
When a new version of the DataSync Client is available, you can update your existing installation without losing your configuration.
How to Update
- Download the latest installer from the DataSync portal landing page
- Run the installer as administrator (same as a fresh install)
- The installer will automatically detect the existing installation and perform an in-place upgrade
What Happens During an Update
The update process is seamless:
- Configuration preserved: Your
appsettings.jsonfile (containing Client ID, Server URL, database connection, and all other settings) is not overwritten. All your settings are kept as-is. - Service handled automatically: The installer stops the running service, updates the application files, and restarts the service automatically.
- Shortcuts updated: Start Menu and Desktop shortcuts are updated to point to the new version.
- Authentication tokens kept: Your Azure AD authentication tokens (stored in
%PROGRAMDATA%) are not affected by the update.
3. Configuration Tool Reference
The DataSync Configuration Tool provides a graphical interface for managing all client settings. This section provides detailed information about each tab and its options.
Settings Tab
Essential connection and client settings:
| Setting | Description |
|---|---|
| Client ID | The unique identifier for this client, as assigned by the server based on your install key. This field is read-only and always comes from the server — it is not read from or overridden in appsettings.json. |
| Server URL | The base URL of the DataSync server (provided by your administrator) |
Note: The polling interval is managed by the server and can be adjusted by your administrator from the DataSync portal.
Database Tab
Configure your local SQL Server database connection. The client will synchronize data to this database.
| Element | Description |
|---|---|
| Connection String | The SQL Server connection string for your local database, stored in this machine's appsettings.json under ConnectionStrings:LocalDb. Edit it here and click Save Connection String to write it back to the file. |
| Test Connection | Tests the connection string currently shown in the box by attempting to connect to the database. |
| Save Connection String | Saves the connection string to appsettings.json. You'll be offered to restart the service so it picks up the new value. |
Client ID, Client Name and Tenant shown in the Configuration Tool always come from the server based on your install key — they are never read from local settings.
Note: The service reads the connection string when it starts. After you save a change, restart the DataSyncClient service for it to take effect.
Authentication Tab
Manage your Azure AD authentication status:
| Element | Description |
|---|---|
| Status | Shows current authentication state (Authenticated / Not authenticated) |
| Username | Your authenticated Azure AD account email |
| Token Expires | When your current authentication token expires |
| Sign In / Re-authorize | Opens browser for Azure AD sign-in |
| Clear Cached Tokens | Removes stored authentication tokens (useful for troubleshooting) |
Service Tab
Monitor and control the DataSync Windows service:
| Element | Description |
|---|---|
| Service Status | Current state: Running, Stopped, or Not Installed |
| Start | Start the service (requires administrator privileges) |
| Stop | Stop the service gracefully |
| Restart | Stop and restart the service |
| Refresh | Update the displayed service status |
| Open Event Viewer | Launch Windows Event Viewer to see service logs |
Bottom Action Bar
| Button | Description |
|---|---|
| Save Configuration | Saves all changes to the configuration file |
| Reload | Discards unsaved changes and reloads from disk |
| Validate | Checks for missing required fields without saving |
| Restart service after save | When checked, automatically restarts the service after saving |
4. Authentication
The DataSync Client authenticates to the server with an install key (a
dsk_live_… token you obtain from the portal and set via the Configuration Tool).
The install key is what the service uses for all syncing.
Getting Your Install Key
When the Configuration Tool needs an install key it shows the Install Key dialog, which offers two ways to obtain one.
Option 1 — Generate with Microsoft sign-in (recommended)
- Click Generate with Microsoft sign-in.
- A browser window opens to the Microsoft (Entra ID) sign-in page. Sign in with the account your administrator associated with this client.
- The tool fetches a fresh install key, fills it into the Install Key box, and validates it automatically.
- Click Save & Continue.
Option 2 — Paste a key from the portal
- Open the DataSync portal and sign in.
- Go to Clients, pick (or create) the client for this machine, and click Generate New Key.
- Copy the key (it is shown only once), paste it into the Install Key box, and click Validate.
- Once it shows Valid, click Save & Continue.
Re-Authorization (When Token Expires)
Authentication tokens expire periodically for security. When your token expires, you'll see these symptoms:
- Service logs show authentication errors
- Sync jobs fail with "401 Unauthorized" errors
- Configuration Tool shows "Not authenticated" status
To re-authorize:
- Open the DataSync Configuration Tool
- Go to the Authentication tab
- Click "Sign In / Re-authorize"
- Complete the sign-in process in the browser
- Restart the service if it was running
Clearing Authentication
If you experience persistent authentication issues, try clearing the token cache:
- Open the DataSync Configuration Tool
- Go to the Authentication tab
- Click "Clear Cached Tokens"
- Click "Sign In / Re-authorize" to sign in fresh
5. Managing the Service
Using the Configuration Tool
The easiest way to manage the service is through the Configuration Tool's Service tab:
- Click Start to start the service
- Click Stop to stop the service
- Click Restart to restart the service
- Click Open Event Viewer to view logs
Using Windows Services
- Press
Win + R, typeservices.msc, press Enter - Find "DataSyncClient" in the list
- Right-click and select Start, Stop, or Restart
Using Command Line
Run these commands as Administrator:
sc start DataSyncClient    (Start the service)
sc stop DataSyncClient     (Stop the service)
sc query DataSyncClient    (Check service status)
Viewing Service Logs
The DataSync Client logs detailed information to multiple locations:
Windows Event Log:
- Open Event Viewer (
eventvwr.msc) - Navigate to: Windows Logs > Application
- Filter by Source: "DataSync"
Log File:
[Installation Directory]\log.txt6. System Requirements
Minimum Requirements
| Component | Requirement |
|---|---|
| Operating System | Windows 10/11 or Windows Server 2016+ |
| .NET Runtime | .NET 10.0 or later (included in installer) |
| Database | SQL Server 2016 or later |
| Network | Internet access to DataSync server |
| Disk Space | 100 MB for application, additional space for local database |
Network Requirements
Ensure outbound HTTPS (port 443) access to:
- DataSync server URL (provided by your administrator)
login.microsoftonline.com(Azure AD authentication)- Azure Blob Storage endpoints
7. Automatic Updates
The DataSync Client supports automatic updates. When a new version is available on the server, the client will automatically detect, download, and apply the update without user interaction.
How It Works
- The client reports its current version to the server with each heartbeat
- If a newer version is available, the server includes update information in the response
- The client downloads the update package and extracts it
- A dedicated updater utility stops the service, copies the new files, and restarts it
- Your configuration (
appsettings.json) is preserved during updates
Update Log
The updater writes a log file for troubleshooting:
C:\Program Files\DispatchScience\DataSyncClient\updater.logRollback
If an update fails, the updater automatically rolls back to the previous version and restarts the service. No manual intervention is required.
If an Update Keeps Failing
A failed update does not stop data synchronization — the client keeps syncing on its current version the whole time. To avoid repeatedly retrying a problematic update, the client limits itself to a few attempts per version (spaced a few minutes apart) and then stops trying, leaving you running safely on your existing version. It will try again automatically later in case a corrected update has been published. If a client seems stuck on an old version, contact your administrator, who can remove it from the update or investigate using the log above.
8. Troubleshooting
Service Won't Start
Check Authentication:
- Ensure you have signed in via the Configuration Tool
- Try clearing cached tokens and re-authorizing
Check Configuration:
- Verify all required fields in the Configuration Tool
- Test the database connection
- Ensure the Server URL is correct and accessible
Authentication Errors
| Error | Cause | Solution |
|---|---|---|
| "401 Unauthorized" | Token expired | Re-authorize using Configuration Tool |
| "403 Forbidden" | No tenant permission | Contact administrator |
| Sign-in page errors | Network/browser issues | Check network, try different browser |
Sync Not Working
| Issue | Possible Cause | Solution |
|---|---|---|
| No jobs available | No new data on server | Check with administrator |
| Connection timeouts | Network issues | Verify server URL and firewall |
| Database errors | Connection string invalid | Test connection in Config Tool |
| "Execution Timeout Expired" while applying a table | A very large table is slow to update on the local SQL Server | The client applies changes in batches so this is rare; if it persists, ensure the local SQL Server is not under heavy load and contact your administrator (the apply timeout is managed by the server — see note below) |
appsettings.json, so there is nothing to
configure on the client. If a very large table genuinely needs more time, contact your
administrator.
8. Support
Getting Help
If you encounter issues not covered in this manual:
- Check the Logs: Review the Event Viewer logs for detailed error messages
- Verify Configuration: Ensure all settings match what your administrator provided
- Contact Your Administrator: They can verify server-side configuration and tenant settings
Information to Provide When Requesting Support
- Client ID (auto-generated, shown in Configuration Tool Settings tab)
- Tenant ID
- Error messages from Event Viewer
- Steps to reproduce the issue
- Windows version and SQL Server version
Quick Reference
| Item | Location |
|---|---|
| Configuration File | [Installation Directory]\appsettings.json |
| Log File | [Installation Directory]\log.txt |
| Token Cache | %PROGRAMDATA%\DispatchScience\DataSyncClient\msal_token_cache.bin |
| Service Name | DataSyncClient |
| Default Install Path | C:\Program Files\DispatchScience\DataSyncClient |
This manual is maintained by Dispatch Science.